Friday, June 27, 2014

BLUE IRIS PILLOW

I have been sewing like crazy and this is about all I have to show for it!  And this was a birthday gift for a fellow yogini.  Several weeks back I posted pictures I was having printed onto fabric, and this is the only one I've made so far.


Of course, that's because I've been making so many other pillows that I am actually getting paid to make, that making my photo pillows is not a real priority.  I made 3 giant, and I do mean GIANT pillows today.  The down inserts are 30" x 30"!  The actual pillows were 34" square.  I also made 2 smaller pillows, which really aren't that small until you put them beside the jumbo ones.  They took 24" inserts and were 28" with the flange.  But I have no pictures of those.  They got picked up and delivered to their new home.  One of these days I am hoping to get photos of all the things I've made in the last 2 months.


Friday, June 20, 2014

NEW CUSHIONS FOR WICKER SOFA AND CHAIRS

This is the second time I have done this sofa and chairs.  Last time, 3 or 4 years ago, my client chose a tiny blue pinstripe.   This time it is a golden yellow interlocking chain print.  As I was telling her, in some ways a pattern like this is easier, and in some ways, harder to work with.


It makes it easier to cut out, especially when the pattern is so even, as this one is.  And it didn't hurt that it is an outdoor fabric and has a lot of body to it.


What makes it a bit more challenging is it has to be matched more perfectly.


The living room


I matched it pretty dang well, if I do say so myself, and I do!!  My client was impressed and happy with the new color and the brightness it brought to the room.  Can't ask for more than that!

Friday, June 13, 2014

NEW PHOTO PILLOWS...COMING SOON


These are all photos I've taken, and, for once, I did not alter them in Photoshop.  I did, however, enhance the color somewhat.  Because they are being printed on fabric, the colors tend to get rather muted.  I thought if I started with more intense colors, they might come out more true to life on the fabric.  Once I get them made, I'll post those pictures.


Saturday, June 7, 2014

'FACELIFT' FOR BEDROOM CHAIR AND OTTOMAN

This is an example of exactly what a slipcover is good for--my client's chair and ottoman are in perfectly good condition, and she still likes the fabric.  She just wanted to update the bedroom for spring and summer without reupholstering the furniture.


Then, sometime in the fall, she can remove the slipcovers, change out the rug and go back to her heavier, darker bedspread.  And voila ... 'new' bedroom.

Saturday, May 31, 2014

PILLOWS GALORE!

I have been working with designer Cara Clancy here on Coronado for the last 6 weeks.  She has multiple jobs going at the same time, and because of this, I am making roman shades, slipcovers and pillows for 5 different houses, all at the same time.  The pictures below are of some of the 52 (!) pillows I've made so far.  This is basically the staging area for them before they get put in the appropriate house.  Once everything is in place, I'll be able to shoot pictures of the finished products where they belong.


Friday, May 23, 2014

OFFICE CHAIRS

When my client called and said she had four chairs, office-style, but used in her dining room, that had separate seat and back cushions, I told her I'd have to come and look at them.  Clearly, this is a reupholstery job, but I thought I could do the back cushion with a slipcover.  Ha!

I knew the seat, though rounded and curved in a way that isn't obvious in these pictures, would be challenging, but, basically, it was just a wrapped seat with welting along the bottom edge.  No problem.


I had to remove the old fabric, which just means a lot of pulling the old staples out with needle-nose pliers.  It also gives me a pattern for the new fabric.  Even after I took the fabric off the backs, I still thought I could slipcover it and then staple it on at the bottom.  Again, ha!  I tried doing it that way, but it simply did not work.  So, I went to UFO to get the metal spiky pieces (don't even know what they are called since I do NOT do upholstery!) and while there I inquired as to the cost of having 4 chairs, with seat and back cushions done, just in case.


What also isn't completely obvious in the pictures is how curved the backs actually were.  I tried and tried to do them.  I spent so much time and effort, and in the end, I had to take the backs down to UFO to be done by professionals.  No matter how I tried, I could not get them to work.  It's not like I didn't already know this, but, truly, I am able to do the very simplest of upholstery.  Anything more, I do not have the ability to do.  I did lose money on the job, and I learned a valuable lesson...leave the reupholstering to those who actually do reupholstering!

Friday, May 16, 2014

ORIGINALLY POSTED ON 9 DECEMBER 2008


I have been sewing since I was a little girl.  My mother would not buy me doll clothes (she said the quality was bad and that they were too expensive,) so if I didn't want naked dolls, I had to learn to sew.  The photo is of a doll dress I made sometime in 1967.  I am still amazed at the quality, even though I knew nothing at the time of finishing seams.  I guess I was always a bit of a perfectionist when it came to sewing.  I have it on my bulletin board,  just to remind me that if I do a good job, it will last through the years.   And I still think it is the coolest dress my Francie doll ever had!


I made my first dress for myself when I was 8 years old.  I can still remember it like it was yesterday:  it was a wrap-a-round dress with 3 armholes, made with yellow kettle cloth (Is this fabric even still around?) and orange bias tape that went on all the raw edges.  Oh, how I wish I still had that dress!    

I sewed all through high school and college, sometimes for others but mostly just for me.   With very few exceptions, I sewed only clothing, even having a clothing business in the early 80's.  When I returned to the States in 1990 from living and working in Europe for 3 years, I turned to sewing for the home.  I had a successful custom home furnishings business in Chicago for 10 years before moving to California in early 2001.  I reestablished my business in Coronado and have been happily doing custom work here ever since.  

Friday, May 9, 2014

TRAINING DRAPERIES

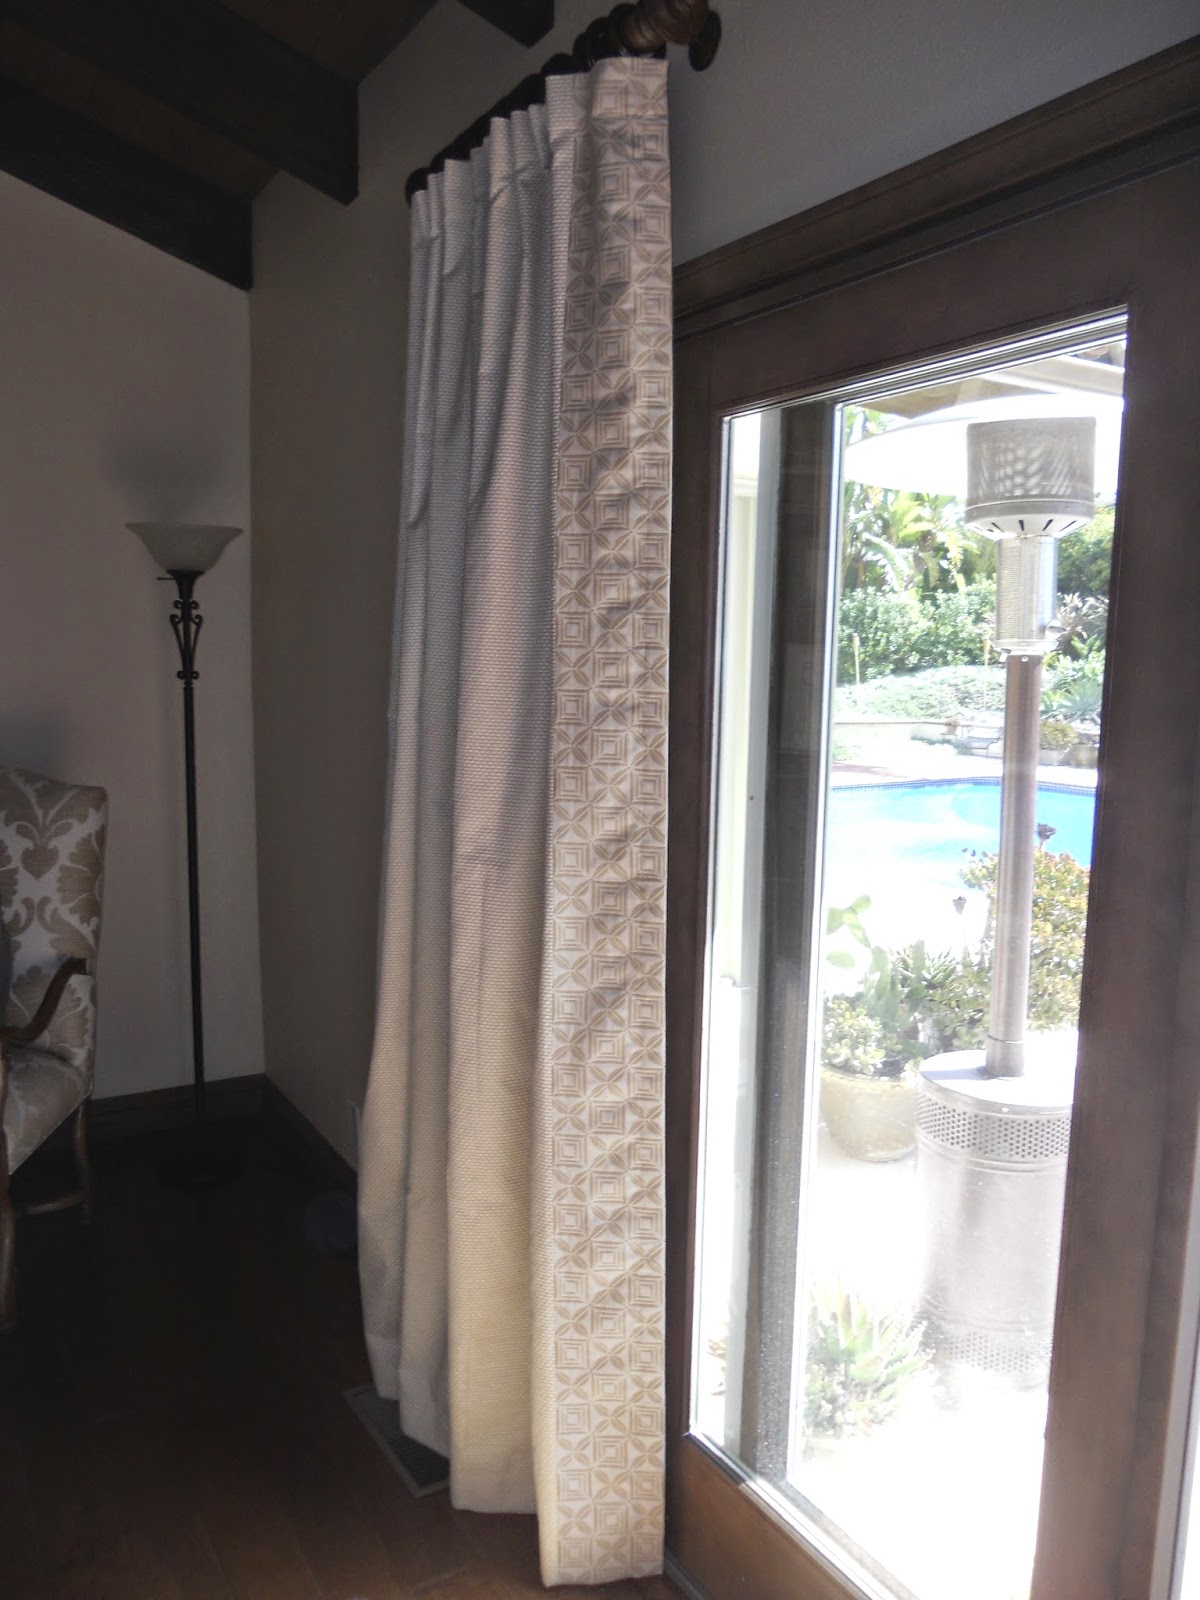
I made these drapery panels for a client in Rancho Santa Fe.  When we hung them up (on the already installed rods--if I were ever to install a rod, your house would probably fall down,) they definitely looked like they needed a little help.  They just did not seem to want to hang properly.  Luckily, the designer I was working with is really good at training them to look the way they are meant to look.  It involves folding, pleating and then tying them in place.  You usually leave them this way for a week or so.


To add interest on the very plain cream-colored chenille, I put banding on either side of each panel.  These panels were decorative.


In the end, you have beautifully, well-trained drapery panels.  I do not have a picture of the 'after' since I was there the day we put them up and not a week later when the ties came off.

Friday, May 2, 2014

SIMPLE PILLOW, BIG IMPACT


There was just a scrap of this fabric left, not even enough to do both the front and back, just enough for the front of the pillow.  And not enough of the solid linen I used on the back to do welting.  


And because I dislike installing invisible zippers (well, that WAS true until I got an invisible zipper foot for my machine, now they aren't so bad,) I did buttons.  I chose the abalone buttons from my vast collection. My client was happy and her love seat was happy.

Friday, April 25, 2014

A SMALL OTTOMAN AND ROMAN SHADES

Another job for Kim Kelly...last year when I visited Kim after being in the Bahamas, I measured this little ottoman for a new slipcover, and the windows for roman shades.  Because I shipped everything to her, I was not able to get photographs until last week.


The fabric is linen.  I had the fleur-de-lis printed on the top piece before I made it.  The skirt is a small knife pleat.


This linen was the strangest fabric.  The color and texture of it completely changed with washing.  So much so that, though I normally do not wash fabric when I am making roman shades (because it's not like you can take them down and wash them, so shrinkage is not an issue,) because it changed so drastically, I had to wash all of the fabric.  Otherwise, it would have looked like two different fabrics. 


The funny thing is, in these pictures it looks like the shade and ottoman are different colors.  It's just the lighting between the house and the back deck.  They really are the same fabric, pre-washed before construction.  


Friday, April 18, 2014

A 'WILD' SLIPCOVER FOR SCOUT

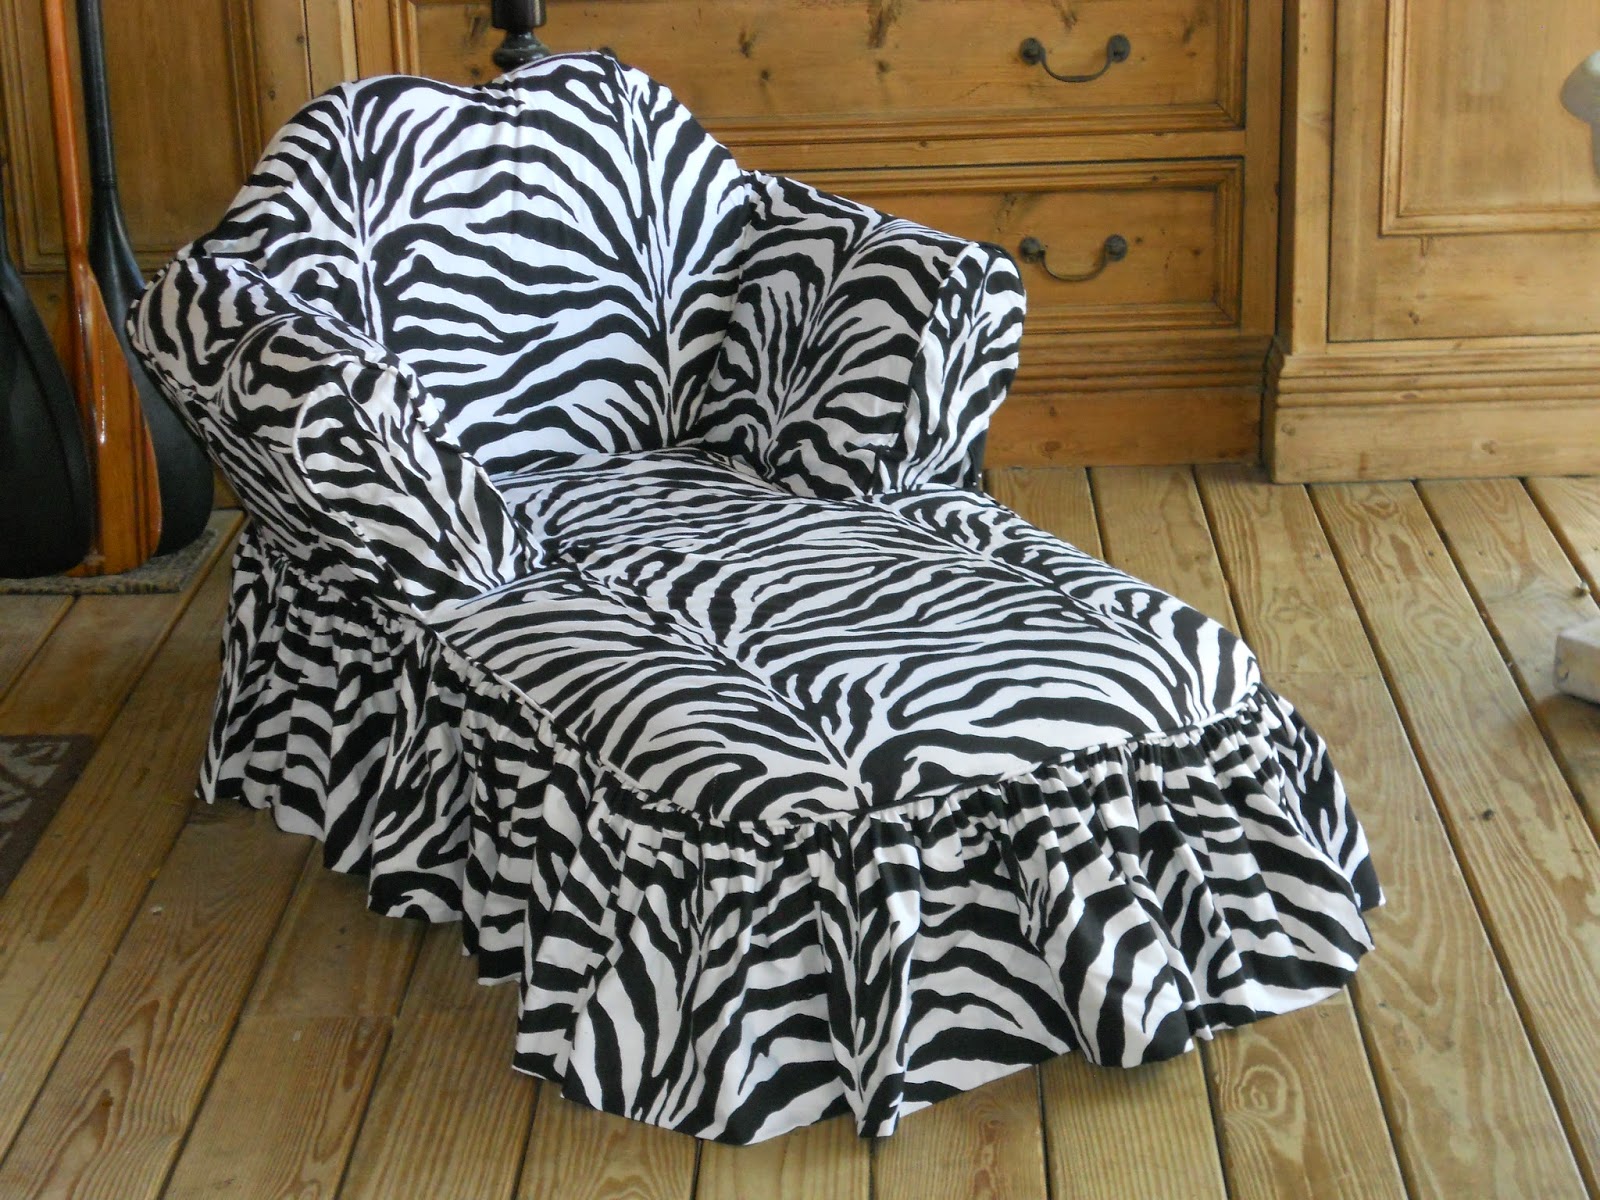
I delivered this slipcover to Kim Kelly on Saint Simons Island last week.  Since I was already going to be in Georgia for the Masters, I brought it with me instead of shipping it.  Her house is being photographed for a national magazine and this particular chaise needed a new cover badly.  It may or may not make it in the magazine because it is a lot brighter than most everything else.  No matter.

I am not a fan of any animal print.  I think they look fine on animals, but no place else.  That's just me.  Lots of people, including Kim, love them.  That being said, I do like the way this turned out and think it looks really good on the chaise.  This fabric is an outdoor fabric and will hold up better than the previous cover I made out of regular cotton.


Because the fabric is so 'wild,' the buttons hardly show.  In this case, they are more than just a decorative touch.  They are needed to get the slipcover on and off the chaise.


Scout, looking pretty, on her new chaise!

Friday, April 4, 2014

NEW LIFE FOR OLD FURNITURE

My clients moved from the suburbs of Minneapolis to Coronado, and though they had furniture that worked well here, the fabrics did not.  

This linen is much lighter and airier than the dark brown paisley that these chairs were wearing before.


The challenge (is there ever NOT a challenge in my jobs?) for the back cushions was they snapped on to the chairs.  The little tabs were sewn into a seam about 4" down from the top and went around the back and snapped underneath.  The only way to make this work was to cut off the tabs, cover them with the new fabric and leave just the snap head out.  Because of where they snap, you cannot see the little bit of original fabric that shows.


This bench in the hallway is from IKEA and the cushion is velcroed to the top.  If I've never mentioned it before--I HATE VELCRO--and avoid using it at all costs.  In this case, however, the solution was to cut the existing Velcro off and sew it on the new bottom piece, so the cushion stays in place.


I do not normally do upholstery, but dining chair seats are usually doable.   Let's just say these 6 chairs were a big, fat pain and took about 20 hours to remove the old fabric and all the staples.


Again, this fabric adds a lightness to the room.  And the existing yellow tablecloth matches the new seat covers.


Best of all, my clients love the new look.

Friday, March 28, 2014

GOOD OLD SUNBRELLA

My client got these cushions at Pottery Barn for a ridiculously low price.  The only problem was the color…it was bright green and not what she wanted.  Luckily, she knew the solution was to slipcover them.  Problem solved!

We ordered the fabric from Outdoor Fabrics, which has every conceivable Sunbrella made and at great prices.


I did these two chaises last year.


Then a few weeks ago, after attempting to wash these round cushions, my client realized new covers for the three of them were warranted.  


Fortunately, the fabric was still available.  Now, her patio is all dressed up and looking good!

Friday, March 21, 2014

A NOT-SO-SIMPLE PILLOW

Looks simple enough, but it wasn't.  Especially since I had never made a pillow like this.  First, I had to figure out how to do it.  So I googled 'double flanged pillow.'  I finally found an image, of a linen pillow, that made sense and I printed it, so I could continue to refer to it.


What made this more challenging was the fabrics--the main fabric is a wool and cashmere blend, not horribly heavy, but not as lightweight as linen; the pink tweed is also a heavier weight.  


The other challenge was the amount of fabric.  There was only exactly enough to make the pillow.  There were also 3 other pillows out of the wool/cashmere in a somewhat different style, what I call a fake flange.  The 'flange' was not a separate, mitered piece sewn to the body of the pillow.  It was just a larger than finished size that was then stitched 1 1/2" in from the outside edge, giving the illusion of a flange, when, in fact, it isn't a true flange.


Anyway, because I had never made a pillow like this, or even the other ones, it took far longer than it should have.  And though I do like the way it turned out, I won't mind if no one ever asks for this style again!


The designer has yet to see it, but I am sure she'll be happy.