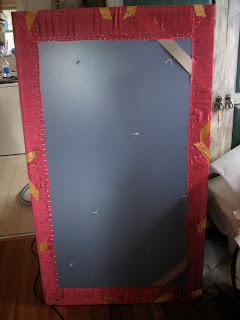
I did these (4) very large padded bulletin boards for BE Styled.
Close up of button

Then the real fun began. I used this extra long upholstery needle and roman shade cord to 'sew' the buttons at the intersections where the ribbon met.


Eventually all 4 will be mounted on the wall.
This is what I started with. The size? 72" x 40"!
I glued batting to the cork side.
Then upholstered it with the fabric. In this case, it was drapery panels from IKEA. Then I put the ribbon on, stapling it to the backside.
The back view.

A close-up of the cord. I didn't actually sew the buttons on. I pushed the needle through with one side of the cording, then put the button on and pushed it through again. To give it the tufted look, I pulled the cording tight and tied it off. Let me tell you, it wasn't easy and my hands were very sore.

In the shop

Eventually all 4 will be mounted on the wall.


11 comments:
How cool is this!!! I just got rid of one in my girls room that never really matched. You have inspired me to recover and re-use instead of heaping it on the the garbage pile-making waste again and buying another:)
Love and Hugs My friend,
Laurel
I have always wanted to make one of these and actually have a large board put aside. Thanks for the tutorial!!
xoxo
Jane
Oh, great blog makeover!!
They're big and beautiful!!
Love the new blog look1
Those really ARE giant! Nice work, as usual :) Did they choose the fabric..it's pretty. Going to the flower show? I bet you are!
Great idea Tamerie
Looks fab with everything hanging on it... love those cute dresses too.. xxx Julie
Wow those are great and huge! You have me thinking of all sorts of ways to use them! Thanks for the inspiration.
Nice job, Tamerie. They look beautiful!
I love these......
I am loving the bulletin boards girl! Thanks for stoppng by! You're right that once you're at the beach- nothing else matters!
Hugs!
Sandy
Well these boards are pretty darn cute.
Terisa
Post a Comment